 Janic Duplessis
cc068b0551
Janic Duplessis
cc068b0551
Summary: I wanted to configure the RN dev menu without having to write native code. This is pretty useful in a greenfield app since it avoids having to write a custom native module for both platforms (and might enable the feature for expo too). This ended up a bit more involved than planned since callbacks can only be called once. I needed to convert the `DevSettings` module to a `NativeEventEmitter` and use events when buttons are clicked. This means creating a JS wrapper for it. Currently it does not export all methods, they can be added in follow ups as needed. ## Changelog [General] [Added] - Export the DevSettings module, add `addMenuItem` method Pull Request resolved: https://github.com/facebook/react-native/pull/25848 Test Plan: Tested in an app using the following code. ```js if (__DEV__) { DevSettings.addMenuItem('Show Dev Screen', () => { dispatchNavigationAction( NavigationActions.navigate({ routeName: 'dev', }), ); }); } ``` Added an example in RN tester 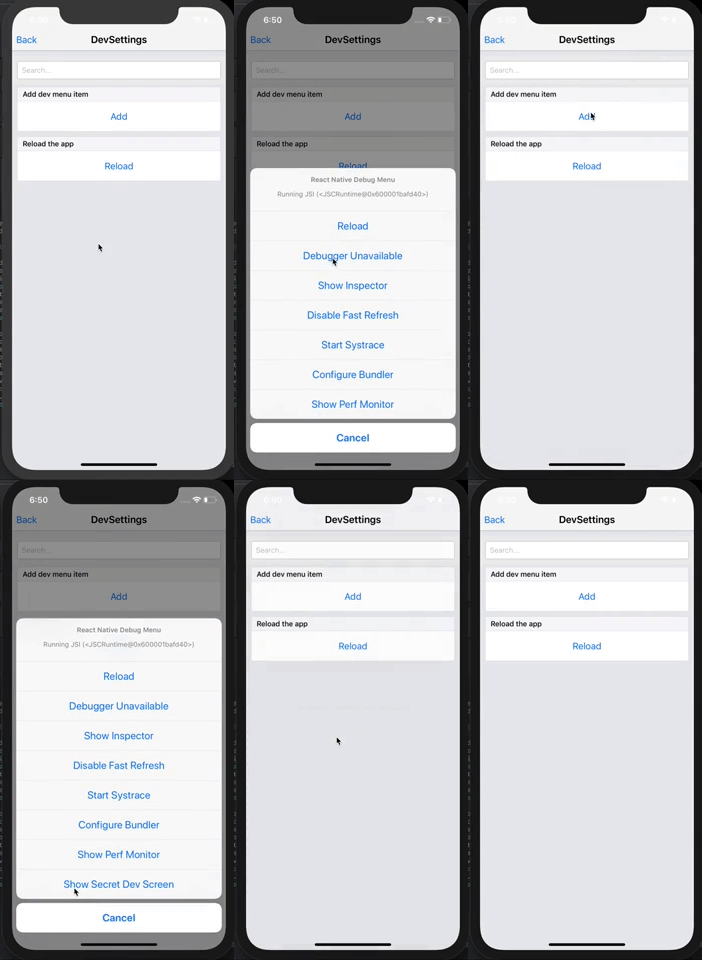 Differential Revision: D17394916 Pulled By: cpojer fbshipit-source-id: f9d2c548b09821c594189d1436a27b97cf5a5737

RNTester
The RNTester showcases React Native views and modules.
Running this app
Before running the app, make sure you ran:
git clone https://github.com/facebook/react-native.git
cd react-native
npm install
Running on iOS
Both macOS and Xcode are required.
- Install CocoaPods. We installing CocoaPods using Homebrew:
brew install cocoapods - Run
cd RNTester; pod install - Open the generated
RNTesterPods.xcworkspace. This is not checked in, as it is generated by CocoaPods. Do not openRNTesterPods.xcodeprojdirectly.
Running on Android
You'll need to have all the prerequisites (SDK, NDK) for Building React Native installed.
Start an Android emulator.
cd react-native
./gradlew :RNTester:android:app:installJscDebug
./scripts/packager.sh
Note: Building for the first time can take a while.
Open the RNTester app in your emulator.
If you want to use a physical device, run adb devices, then adb -s <device name> reverse tcp:8081 tcp:8081.
See Running on Device for additional instructions on using a physical device.
Running with Buck
Follow the same setup as running with gradle.
Install Buck from here.
Run the following commands from the react-native folder:
./gradlew :ReactAndroid:packageReactNdkLibsForBuck
buck fetch rntester
buck install -r rntester
./scripts/packager.sh
Note: The native libs are still built using gradle. Full build with buck is coming soon(tm).
Running Detox Tests on iOS
Install Detox from here.
To run the e2e tests locally, run the following commands from the react-native folder:
yarn build-ios-e2e
yarn test-ios-e2e
These are the equivalent of running:
detox build -c ios.sim.release
detox test -c ios.sim.release --cleanup
These build the app in Release mode, so the production code is bundled and included in the built app.
When developing E2E tests, you may want to run in development mode, so that changes to the production code show up immediately. To do this, run:
detox build -c ios.sim.debug
detox test -c ios.sim.debug
You will also need to have Metro running in another terminal. Note that if you've previously run the E2E tests in release mode, you may need to delete the RNTester/build folder before rerunning detox build.
Building from source
Building the app on both iOS and Android means building the React Native framework from source. This way you're running the latest native and JS code the way you see it in your clone of the github repo.
This is different from apps created using react-native init which have a dependency on a specific version of React Native JS and native code, declared in a package.json file (and build.gradle for Android apps).